This is the most common inquiry we receive, and ironically, the most inefficient. Our sales engineers are forced to reply: “How long? What diameter? What thread size? What kind of wire insulation?”
This back-and-forth “email ping-pong” can delay your order by 3 to 5 days. And in a manufacturing environment, downtime is money.
Here is the reality: An industrial thermocouple is not a standard bolt or washer. It is a highly customizable instrument. A change in just one specification—like selecting PVC insulation instead of Fiberglass—can cause the sensor to melt and fail within minutes of installation.
This guide is your OEM Specification Sheet. Whether you are buying from HT-Heater or another supplier, if you follow this 7-step checklist, you will eliminate ambiguity and receive a sensor that is perfectly engineered for your application on the first try.
Incoloy 800:Highly Recommended for heat treatment furnaces. Resists oxidation and creep up to 1100°C.
Ceramic (Alumina): Mandatory for Type R/S/B noble metals (>1200°C).
Step 4: Immersion Length (The “Reach”)
Definition: This is the length of the metal probe that sits inside the process environment.
Warning: Do not just measure the total length!
If you use a Fixed Thread, measure from the probe tip to the bottom of the hex nut.
If you use a Compression Fitting, measure the total probe length, as the fitting can slide.
Engineering Rule: Immersion depth should be at least 10x the Diameter to ensure accuracy (e.g., a 6mm probe needs 60mm immersion).
Step 5: Process Connection (The “Anchor”)
How does the sensor attach to the wall?
Compression Fitting (Adjustable): The most versatile option. A ferrule slides along the sheath and locks down when tightened. Allows you to set the depth in the field.
Fixed Thread (Welded): Permanently welded to the sheath. Stronger, leak-proof, but length must be exact.
Bayonet Cap (Spring): Used in plastics machinery. Twist-and-lock mechanism.
No Thread (Straight Probe): Used with a separate Thermowell.
Thread Specs: 1/2″ NPT (US Tapered), 1/2″ BSP/G (British Parallel), or Metric (M12x1.5). Always check with a thread gauge!
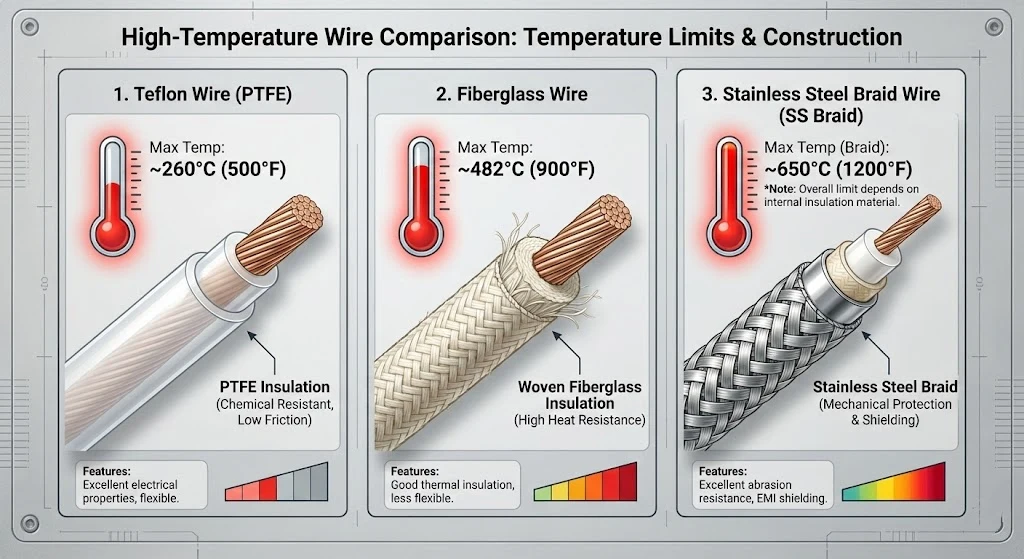
Protection: Add Stainless Steel Over-braid (SSB) for abrasion resistance.
Connector (Plug):
Standard: Round pins.
Mini: Flat pins (handhelds).
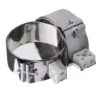
Terminal Head: An aluminum or steel “head” (Type KNE, KSC, MA) that protects the ceramic block. Required for outdoor or hazardous (Ex d) areas.
Step 7: Quantity & Lead Time
Volume: We are an OEM factory. The setup cost for 1 custom unit is high. Ordering 10+ units significantly drops the unit price.
Lead Time: Standard custom probes take 3-5 days. Emergency rush service (24h) is available for critical breakdowns.
Common Customization Pitfalls (Read Before Ordering)
The “Ambient Temp” Mistake
Engineers often focus on the probe temperature but forget the wire temperature.
Scenario: Your furnace is 1000°C. The probe handles it fine. But the heat radiates out to the back of the probe where the wire connects. If you chose PVC wire (max 105°C), it will melt and short out.
Solution: Request a “Transition Fitting” with a Spring. This moves the wire connection 50mm away from the hot wall, allowing it to cool down.
The “3-Wire” Thermocouple Myth
We often get requests for a “3-wire Type K thermocouple.”
Fact Check: A standard thermocouple has 2 wires (Positive and Negative).
The Confusion: If you see 3 wires, it is likely:
A Pt100 RTD (which is standard 3-wire).
A Thermocouple with a Ground Shield (2 signal wires + 1 bare ground wire).
Action: Check the colors. If you see Red/White/Red, it’s an RTD. If you see Yellow/Red/Bare, it’s a shielded Type K.
Diagram showing parts of an industrial thermocouple assembly.
Downloadable Spec Sheet
Copy & Paste This Into Your RFQ Email
To get a quote within 2 hours, simply fill in the brackets and email us:
Subject: RFQ for Custom Thermocouples
Calibration Type: [ e.g., Type K, Grounded ]
Sheath Dimensions: [ e.g., 6mm OD x 200mm Length ]
Sheath Material: [ e.g., SS316 ]
Process Connection: [ e.g., 1/2″ NPT Compression Fitting ]
Lead Wire: [ e.g., 3 Meters Fiberglass with SS Braid ]
Termination: [ e.g., Standard Yellow Male Plug ]
Quantity: [ e.g., 20 pcs ]
Frequently Asked Questions (FAQ)
How do I measure thermocouple length?
Always measure from the tip of the probe to the start of the threaded fitting (for fixed threads) or the total probe length (for compression fittings/adjustable depth). Do not include the length of the flexible lead wire or the connector body in the “probe length” measurement.
What is the difference between grounded and ungrounded thermocouples?
Grounded junctions have the sensor wires physically welded to the metal sheath tip. This gives faster response times but makes the sensor susceptible to electrical noise (ground loops). Ungrounded junctions have the wires isolated in powder, protecting them from interference at the cost of slightly slower response.
Can I cut thermocouple wire to length?
Yes, you can cut the flexible lead wire (extension wire) to the desired length without affecting calibration. However, you must NOT cut the metal sheath (probe) itself, as the sensing junction is located at the very tip. Cutting the probe destroys the sensor.
What is a compression fitting?
A compression fitting is a connector that slides along the probe sheath and tightens down at any point. This allows you to adjust the immersion depth of the sensor in the field, making it a versatile choice for stocking spares compared to fixed-welded fittings.