In a 24/7 high-volume production environment, there is no such thing as a “convenient” heater failure. When a band heater fails on a Friday night shift, the cost to the organization is not merely the $50 for a replacement part. The true cost is measured in thousands of dollars of lost throughput, the labor required to purge cooled barrels, and the volume of scrap material generated during the subsequent thermal ramp-up.
Treating industrial heating elements as “run-to-fail” consumables is the most expensive maintenance strategy a facility can adopt. Band heaters are precision thermal-transfer instruments; their lifespan is directly dictated by the integrity of their mechanical clamping and the cleanliness of their electrical environment.
This guide provides a professional-grade preventative maintenance (PM) framework designed for Maintenance Directors and MRO Supervisors. By shifting from reactive “firefighting” to a data-driven proactive model, facilities can extend the service life of their heating elements by up to 300% while virtually eliminating unplanned thermal downtime.
Consistency is the prerequisite for longevity. A disciplined monthly inspection of terminal torque, barrel cleanliness, and clamping tension prevents 90% of common failure modes, such as arcing and hot spots.
If your current heaters have already surpassed the point of viable maintenance, locate the correct technical replacement in our [Industrial Band Heaters Guide].
1. The Daily Walkthrough: Visual and Sensory Cues
Preventative maintenance begins with operator situational awareness. In a 24/7 shop, the machine often “signals” a looming failure before the PLC triggers a temperature deviation alarm.
Detecting “Smell and Smoke”
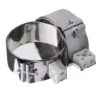
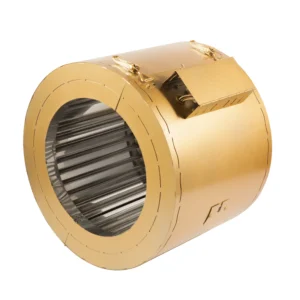
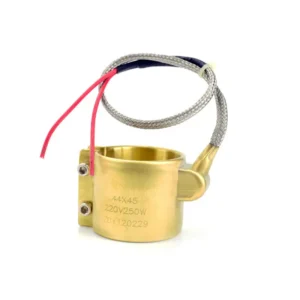
Maintenance teams should train operators to identify the specific olfactory signature of carbonizing polymer. A faint smell of burning plastic near the nozzle—often accompanied by whisps of white smoke—is frequently a precursor to a short circuit in a [Brass Sealed Nozzle Heater]. This indicates that plastic “blowback” has occurred and is beginning to track across the terminals. Immediate intervention can save the heater before dielectric breakdown occurs.
Visual Lead Inspection
During every shift change, a visual sweep of the heater leads is mandatory.
- Insulation Integrity: Look for “chafing” on fiberglass braids. High-vibration environments can cause leads to rub against machine guards, exposing the nickel conductor.
- Discoloration: If the lead wires appear brittle or discolored (turning from silver/white to a dull brown or green), it indicates the terminal is running too hot—a sign of a loose connection or excessive ambient heat.
- Grounding Path: Ensure that no wires are in direct contact with sharp metal edges of the machine frame, which can lead to intermittent ground faults.
2. Monthly Deep-Dive: The Mechanical Integrity Audit
Thermal cycling is the primary enemy of mechanical tightess. As a band heater cycles from ambient to 300°C, the different coefficients of thermal expansion between the stainless steel sheath and the carbon steel barrel create a phenomenon known as “thermal creep.”
Re-Torquing Clamping Bolts
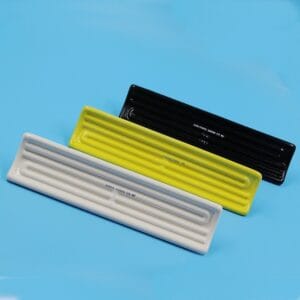
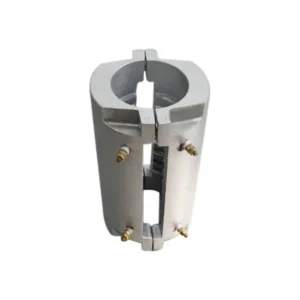
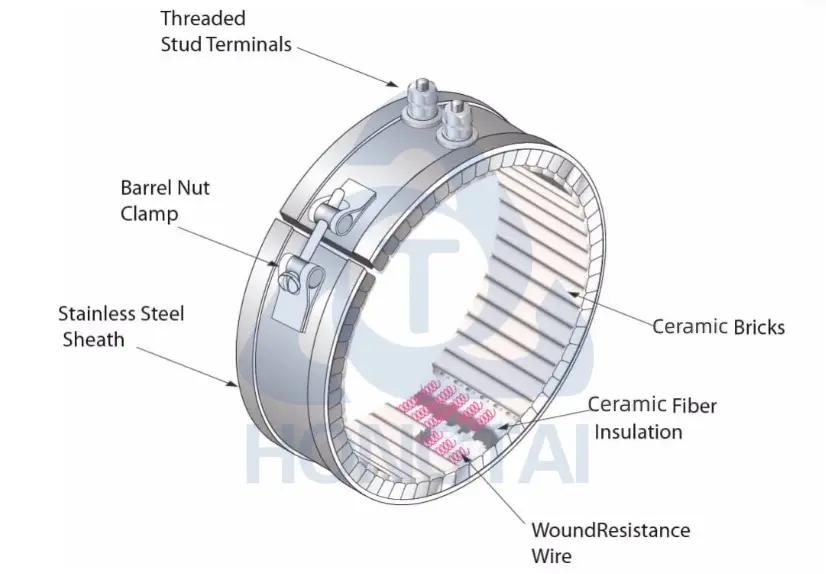
Even a high-performance [Ceramic Band Heater] with a 12mm insulation layer will eventually loosen due to repeated expansion and contraction. Once the heater loses its flush contact with the barrel, an air gap forms. As established in the laws of conduction, air acts as a thermal insulator (k ≈ 0.026 W/m·K), trapping heat inside the element and causing a “hot spot” burnout.
The Hot-Torque SOP: Monthly checks should include a “Hot-Torque” verification. With the machine at operating temperature and wearing appropriate high-temperature PPE:
- Verify the tension of the barrel nuts or flange bolts.
- If the heater has “slack,” tighten it until flush.
- Caution: Do not over-torque to the point of deforming the metal sheath, as this can crush internal mica or ceramic components.
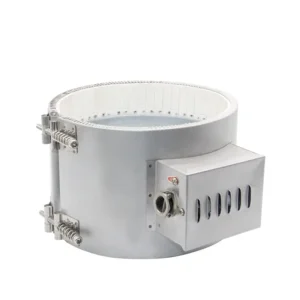
Terminal Health: Oxidation and Tightness
The nuts on post terminals are subject to vibration and thermal loosening. A loose nut increases contact resistance ($R$). According to Joule’s Law ($P=I^2R$), this increased resistance generates localized heat at the terminal. This heat accelerates oxidation, which further increases resistance, eventually melting the terminal post. Ensure all terminal nuts are snug and free of green/black oxidation.
3. The Contamination Protocol: Cleaning the “Killers”
Contamination is the leading cause of dielectric failure in mica-insulated heaters.
Managing “Plastic Burps” and Overflow
When a nozzle leaks, molten plastic can coat the heater. If left to carbonize, this plastic becomes an electrical conductor.
- Action: Use a brass scraper to gently remove plastic buildup while the heater is warm (soft).
- Engineering Note: Never use a steel screwdriver or a heavy file; gouging the stainless steel sheath creates thin spots that lead to localized overheating.
Oil and Hydraulic Leaks
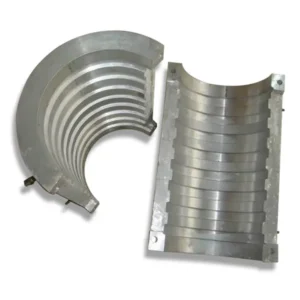
In many facilities, hydraulic oil leaks from overhead lines can drip onto the barrel. For [Mica Band Heaters], oil ingress is a death sentence. The oil seeps into the mica layers and carbonizes internally, leading to a violent short circuit.
- Action: If oil contamination is found, degrease the area immediately. If a mica heater has been saturated with oil, it should be scheduled for replacement during the next planned shutdown, as internal carbon tracking is likely already underway.
4. Electrical Health: Using the Multimeter and Megohmmeter
Advanced maintenance teams use data to predict “End of Life” (EOL) rather than waiting for a fuse to blow.
Resistance (Ohms) Trending
Every band heater has a nominal resistance based on its wattage and voltage:
R = {V^2} / {P}
Technicians should record the Ohms of a new heater upon installation. By checking this quarterly, you can identify “trending.” If the resistance increases by more than 10%, it indicates the internal NiCr resistance wire is thinning or oxidizing. This heater is a “walking ghost” and should be replaced before it fails mid-production.
Insulation Resistance (The “Megger” Test)
While a multimeter checks the wire, a Megohmmeter (Megger) checks the insulation. By applying a high-voltage, low-current signal (typically 500VDC), a Megger measures the resistance between the live circuit and the grounded sheath.
- Benchmark: A healthy heater should show >100 MΩ
- Warning: If the reading drops below 1 MΩ, the insulation is compromised (likely due to moisture or carbon) and the heater is at high risk of a ground fault.
5. Control System Verification: The PID and Relay Check
A band heater failure is often a symptom of a control system malfunction. If the “Brain” (the controller) is failing, it will quickly kill the “Muscle” (the heater).
Testing for “Sticky” Relays
Solid State Relays (SSRs) are the most common failure point in the control loop. They frequently fail in the “Closed” position. When this happens, 100% power is supplied to the heater continuously, regardless of the setpoint. This leads to a runaway temperature that destroys the heater and degrades the resin.
- PM Action: During the monthly audit, verify that the SSR is cycling on and off. If the “Load” LED is always on, the relay is likely shorted.
Thermocouple Drift
If a J-type thermocouple is not seated firmly against the barrel or has vibrated loose, it will read an artificially low temperature. The PID controller will then “over-drive” the band heater to compensate for a perceived cold spot that doesn’t exist. Ensure all sensors are spring-loaded or screwed in securely to provide accurate feedback.
6. The 24/7 Preventative Maintenance Checklist
Use the following table to standardize your facility’s SOP for heater care.
| Frequency | Action Item | Engineering Goal |
| Daily | Visual/Sensory check for smoke, smell, or frayed leads. | Early detection of dielectric shorts and lead abrasion. |
| Weekly | Inspect for polymer leakage/buildup on nozzle heaters. | Prevent carbon tracking and premature arcing. |
| Monthly | Hot-Torque Audit: Re-torque clamping screws & terminals. | Eliminate air gaps, hot spots, and terminal oxidation. |
| Quarterly | Ohm-out heaters and record values in the PM log. | Identify wire thinning and predict EOL for scheduled swaps. |
| Bi-Annually | Inspect SSRs, check grounding, and re-tune PID loops. | Ensure stable thermal control and electrical safety. |
7. Strategic Spare Parts Management
Longevity is improved by how you store your spares. Many “new” heaters fail upon installation because they were stored in a damp maintenance cage.
The 80/20 Rule of Inventory
In most factories, 20% of the heater sizes cause 80% of the downtime. These are usually the nozzle heaters and the first two zones of the extruder. Maintain a minimum of two spares for every “critical” zone identified in your facility.
Proper Storage Conditions
Both mica and ceramic are hygroscopic—they absorb moisture from the air.
- SOP: Store spare heaters in a dry, climate-controlled area.
- Pro Tip: If a heater has been in storage for over six months in a humid environment, “bake” it at 100°C for one hour before applying full line voltage. This safely drives out moisture without causing the internal steam pressure to blow out the insulation.
Frequently Asked Questions
How often should I tighten my band heaters?
You must tighten them immediately after the first heat-up from a new installation. For 24/7 operations, we recommend a monthly mechanical audit. Thermal expansion and high-frequency vibration will loosen clamping hardware over time, leading to destructive air gaps and premature burnout.
Can I clean a band heater that has plastic leaked on it?
Yes, but only the exterior. If plastic has seeped into the folded seams of a mica heater, it is likely already compromised. For the exterior, wait until the heater is slightly warm (to soften the resin), and carefully scrape it away with a brass scraper. Avoid using steel tools which can gouge the stainless steel sheath.
Why should I measure the resistance (Ohms) of a working heater?
Measuring Ohms allows you to “trend” the health of the element. If the resistance increases over time, it indicates the internal NiCr wire is thinning due to oxidation. This data allows you to replace the heater during a scheduled maintenance window rather than suffering an emergency failure mid-run.
Is it okay if my heater leads are touching the machine frame?
No. High-temperature fiberglass insulation becomes brittle over time. If the leads vibrate against a sharp metal frame, the insulation will eventually fail, leading to a direct ground fault. Always use stand-offs or ceramic beads to keep wiring clear of metal edges.