Ordering a custom band heater without precise measurements is an expensive gamble. In the world of industrial thermal processing, “close enough” is a recipe for catastrophic failure. When a custom heater arrives and a thermocouple port is offset by just 5mm, or the inner diameter is 2mm too large, the component is effectively useless.
You cannot “hammer it to fit” an industrial heating element without permanently destroying the internal dielectric insulation and fracturing the resistance wire. For an R&D engineer or procurement manager, a measurement error doesn’t just mean a wasted part; it leads to weeks of delayed production, compromised project timelines, and wasted budget.
This guide serves as your definitive drafting standard for specifying custom industrial band heaters. We will walk through the exact geometric parameters our manufacturing facility requires, explain the thermodynamic reasons why you should never measure a used heater, and provide a foolproof measurement checklist for your next RFQ.
The engineering BLUF (Bottom Line Up Front) is this: Perfect fitment requires three absolute data points: the Outer Diameter (OD) of your machine’s cylinder (not the heater’s ID), the maximum allowable width, and exact Cartesian coordinates for any cut-outs or holes. A tolerance mismatch of even a millimeter creates an air gap, which acts as a thermal insulator and guarantees premature heater burnout.
If you are unsure which insulation material to specify for your custom dimensions, review our [Ceramic vs. Mica Selection Guide] first.
1. The Cardinal Rule: Measure the Barrel, Not the Heater
The most common and costly mistake in reverse-engineering thermal components is using the failed part as the primary dimensional reference.
Thermal Warping of Obsolete Parts
An old, burnt-out heater is a deceptive reference point. After thousands of hours of thermal cycling at 300°C+, the metal sheath undergoes metallurgical changes. It warps, stretches under the tension of the clamping bolts, and loses its original circular geometry. If you measure the Inner Diameter (ID) of a dead heater, you are measuring a distorted dimension that has physically “relaxed” from its manufactured state.
Caliper Placement on the Machine
To ensure a precision fit, measurements must be taken from the source:
- Cool Down: Wait for the machine barrel to reach ambient room temperature to avoid thermal expansion variables.
- Surface Prep: Thoroughly clean off any residual plastic, carbonized oil, or rust from the cylinder.
- Direct Measurement: Use precision calipers directly on the cylinder’s Outer Diameter (OD). If the barrel is too large for calipers, use a “Pi Tape” (diameter tape) which measures circumference and converts it to diameter with high accuracy.
2. Defining Dimensions: Diameter, Width, and Clearances
Once the barrel OD is established, you must define the physical envelope the heater will occupy.
The ID/OD Relationship
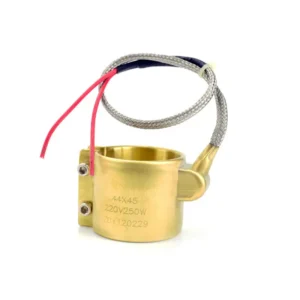
In our manufacturing process, the heater’s nominal ID is engineered to exactly match the barrel’s OD. We account for the necessary manufacturing tolerances (typically -0.00″ / +0.06″) to ensure the heater slides on smoothly while maintaining the tightest possible contact once torqued. When submitting an RFQ to Hongtai (ht-heater.com), always specify the Barrel OD as your primary dimension.
Accounting for Thermal Expansion
A custom heater must include a “Gap”—the space between the two ends of the heater where the clamping mechanism is located. If the two ends of the heater touch when clamped cold, you have zero room for thermal expansion. As the machine heats up, the metal will expand; if there is no gap, the heater cannot be tightened further to eliminate the air gaps that form during expansion, leading to a “hot spot” failure.
3. Navigating Obstacles: Holes, Slots, and Cut-Outs
Modern extrusion barrels are complex, often featuring thermocouple probes, pressure transducers, or mounting bolts that penetrate the heating zone.
The Cartesian Coordinate Method
The most accurate way to communicate complex geometry is to “unroll” the cylinder in your mind, treating it as a flat 2D rectangle.
- Zero-Point: Choose one edge as your $(0,0)$ coordinate (usually the edge opposite the clamping gap).
- X-Axis: Measure the distance from the side edge to the center of the hole.
- Y-Axis: Measure the distance from the top or bottom edge to the center of the hole.
- Diameter: Specify the exact diameter of the hole required. We recommend adding a 2mm “tolerance buffer” to hole diameters to ensure easy alignment during installation.
The “Cold Zone” Buffer
From an engineering perspective, holes cannot be cut arbitrarily into a heater. Our production team must route the NiCr resistance wire around these obstructions. A minimum “Cold Zone” border (typically 12mm or 1/2 inch) must be maintained between the edge of a hole and the internal heating element. This ensures that the insulation remains intact and prevents electrical shorting to the hole’s edge.
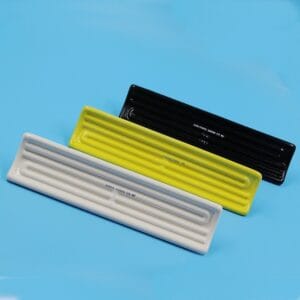
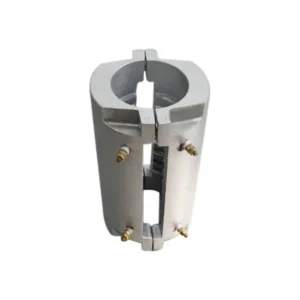
4. Specifying the Termination: Orientation and Clocking
A heater is useless if the power terminals point directly into a structural steel beam or an oil line, making a safe electrical connection impossible.
The “Clock Face” Positioning System
To standardize terminal locations, engineers use the “Clock Face” system. Imagine looking at the end of the barrel:
- 6 o’clock: Usually reserved for the Clamping Gap (to allow for easy access from the bottom).
- 12 o’clock / 3 o’clock: Common locations for Screw Terminals or Lead Wire exits.
- Specify Clearly: e.g., “Terminals located at 2 o’clock, Clamping Gap at 6 o’clock.”
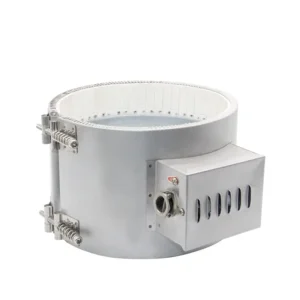
Lead Wire Exits vs. Terminal Boxes
Spatial headroom dictates the termination style.
- Terminal Boxes: Provide excellent protection for electrical posts but require 40-50mm of radial clearance.
- 90-Degree Leads: For extremely tight clearances between the barrel and machine guarding, specify 90-degree exit leads protected by stainless steel braided armor.
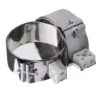
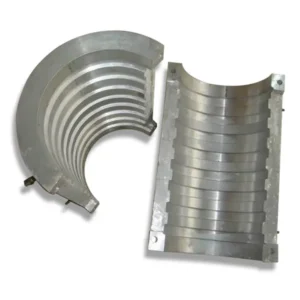
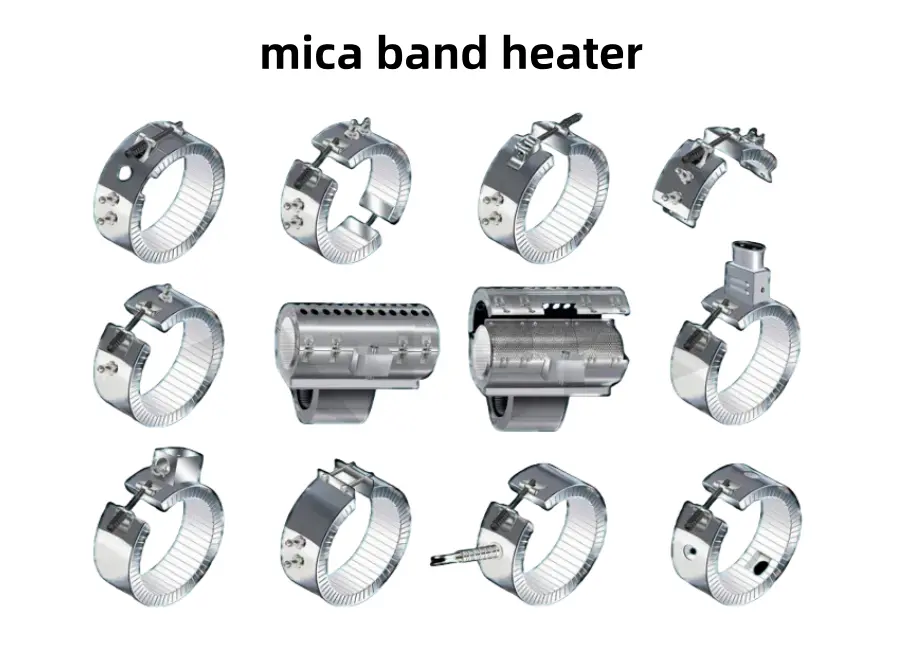
5. Selecting the Right Clamping Mechanism for Custom Shapes
The clamping mechanism must be able to translate bolt torque into uniform radial pressure across the entire surface of your custom-sized heater.
Large Diameters and Two-Piece Designs
For barrel diameters exceeding 380mm (approx. 15 inches), a “One-Piece” heater becomes physically unmanageable and difficult to install without causing permanent deformation. In these cases, a Two-Piece design is mandatory. This allows for easier installation and, more importantly, provides two points of tension, ensuring more uniform clamping pressure around the larger circumference.
Overcoming Thermal Expansion
On large custom formats, the cumulative thermal expansion is significant. For these applications, we highly recommend specifying Spring-Loaded Barrel Nuts. These integrated die springs automatically compress and expand to take up the “slack” created as the metal expands, maintaining a constant, tight fit without requiring manual re-torquing.
6. Power Density Parameters (Wattage & Voltage)
Your custom physical dimensions must be electrically compatible with the laws of physics.
The Watt Density Reality Check
Engineers occasionally request high wattage in very small custom footprints (e.g., a 50mm x 50mm heater at 2000W). According to the principles of Watt Density, this is a recipe for instant failure.
- Mica Limit: ≤ 3 W/cm²
- Ceramic Limit: ≤ 6 W/cm²If your custom dimensions result in a watt density that exceeds these material limits, the internal wire will melt. You must either increase the heater width to gain more surface area or reduce the total wattage requirement.
Dual Voltage and Multi-Zone Capabilities
For large custom heating blocks, you can specify independent heating circuits within a single band. This allows for “Zoned” temperature control (e.g., a 240V/480V dual circuit or two 1000W zones) within one physical heater housing, simplifying your wiring and control architecture.
7. The Custom RFQ Checklist
To receive an accurate quote and prevent manufacturing delays, copy and paste this standardized checklist into your inquiry.
| Parameter | Specification |
| Barrel Outer Diameter (OD) | ______ mm / inch |
| Maximum Heater Width | ______ mm / inch |
| Heater Material | [ ] Mica [ ] Ceramic [ ] Brass Sealed |
| Operating Voltage | ______ V |
| Total Wattage | ______ W |
| Termination Style | [ ] Screw Terminals [ ] Leads [ ] Plug |
| Lead Wire Length | ______ mm (if applicable) |
| Clock Orientation | Terminals at: ___ / Gap at: ___ |
| Holes / Cutouts | [ ] None [ ] See Attached Drawing |
Frequently Asked Questions
Should I measure the inside of my old band heater to order a replacement?
No. After operating at high temperatures, the metal sheath of a band heater warps and stretches. Always measure the Outer Diameter (OD) of the cold machine barrel directly using precision calipers or a Pi-tape to ensure a perfect thermal fit.
How do I specify the location of a thermocouple hole for a custom heater?
Imagine unrolling the band heater into a flat rectangle. Choose one edge as your zero-point (opposite the gap). Measure the distance from the side edge (X-axis) and from the top edge (Y-axis) to the exact center of the required hole. Provide the hole diameter and allow for a 2mm tolerance buffer.
Why did the manufacturer tell me my requested wattage is too high for the size I measured?
Heating elements are constrained by “Watt Density”—the amount of power per square unit of surface area. If you try to pack too much wattage into a small custom heater, the internal resistance wire will overheat and melt instantly. You must either reduce the wattage or increase the width of the heater to distribute the load.
What is the difference between a one-piece and a two-piece custom band heater?
A one-piece heater expands to slide over the end of a cylinder. A two-piece heater consists of two separate halves that clamp together. Two-piece heaters are mandatory for large diameters (over 15 inches) or for installations where obstructions prevent sliding a heater over the barrel end.