Your PID settings are tuned perfectly. Your heater bands are brand new. Yet, your injection molding machine is producing parts with “Black Specks” (carbonization) or “Short Shots” (incomplete filling).
The root cause is rarely the controller—it is often a 0.5mm invisible gap between your sensor tip and the barrel wall.
In the plastics industry, contact resistance is the enemy. If a thermocouple probe is loose, an “Air Gap” forms. Since air is a thermal insulator, the sensor reads a lower temperature than the actual steel barrel. The controller responds by driving the heaters to 100% output, overheating the plastic resin until it degrades or burns.
This guide moves beyond simple part replacement. We will dissect the physics of Spring-Loaded Bayonet and Nozzle thermocouples, providing the installation techniques required to maintain positive contact pressure and eliminate scrap.
The Workhorse: Spring-Loaded Bayonet Thermocouples
The adjustable bayonet thermocouple is the standard for 90% of extruders and injection molding machines. Its design is not accidental; it is engineered specifically to combat thermal expansion and vibration.
Why the “Spring” is Critical
As an extruder barrel heats up from 20°C to 250°C, the steel expands. Simultaneously, the heavy vibration from the screw motor and clamp unit can loosen static screws.
The Physics: A fixed probe would eventually lose contact or be crushed. The spring acts as a dynamic suspension system. It provides continuous positive pressure, pushing the measuring tip firmly against the bottom of the blind hole, regardless of thermal growth or machine shaking.
Identifying Your Bayonet Cap
When ordering replacements, “Standard Bayonet” is not a specification. You must measure the cap ID (Inner Diameter).
12mm ID: The modern industry standard. Fits standard 1/8″ NPT or 3/8″-24 threaded adapters.
15mm ID: Common on older European machines or heavy-duty extruders. Fits M12 or M14 adapters.
Locking Pins: Check the adapter. Does it have 1 pin or 2 pins? Most caps have 2 slots (“L” shaped cutouts), but compatibility varies.
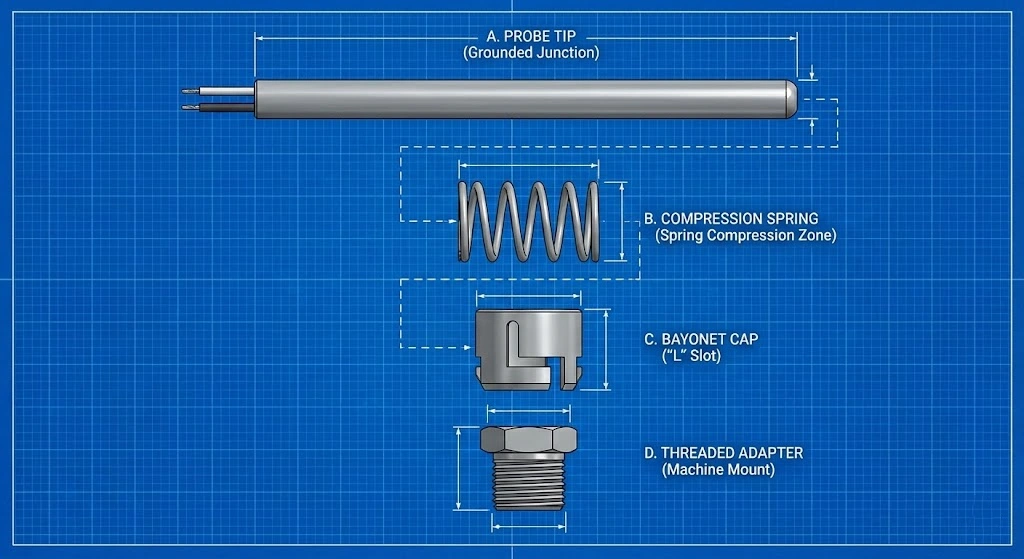
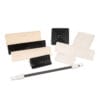
Exploded view of spring loaded bayonet thermocouple components.
The Installation Technique: Setting the “Pre-load”
This is the Standard Operating Procedure (SOP) that separates a master maintenance technician from a novice. Simply twisting the cap on is not enough. You must set the “Pre-load.”
The Incorrect Way: Adjusting the cap so it fits easily and locks with zero resistance. The Engineer’s Way:
Insert: Push the probe into the adapter until the metal tip hits the bottom of the hole.
Position: Slide the bayonet cap down the spring until it touches the locking pins on the adapter.
Compress (Pre-load): Hold the probe tip firmly at the bottom. Push the cap further down the spring by another 10mm to 15mm.
Lock: While maintaining this compression, twist the cap into the locking pins.
The Result: The spring is now compressed, storing potential energy. It exerts a constant forward force (approx. 2-5 lbs) on the tip, ensuring zero air gap even if the machine vibrates violently.
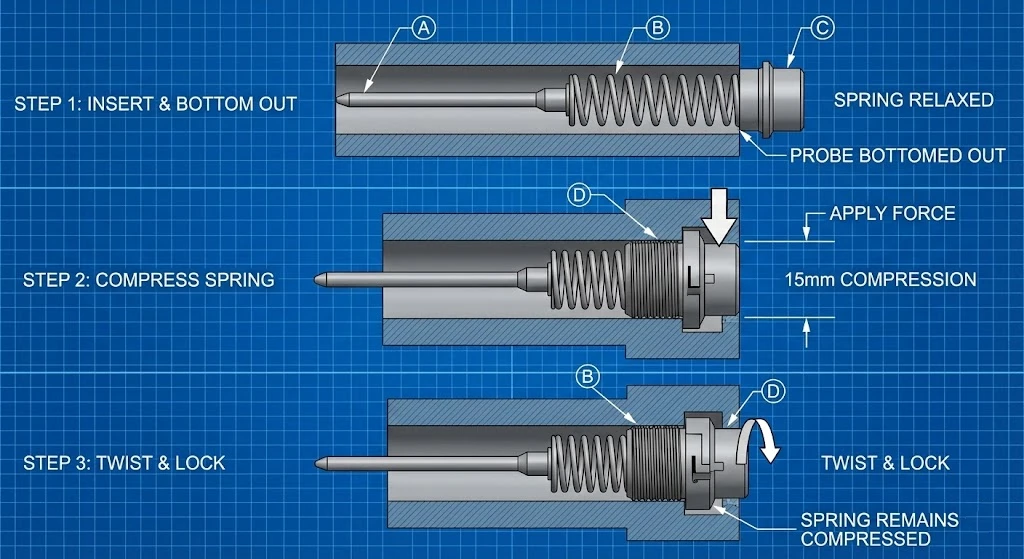
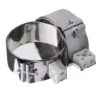
How to install bayonet thermocouple with spring tension preload.
Measuring the “Melt”: Nozzle & Melt Bolts
Measuring the barrel wall is good for zone control, but measuring the plastic itself is critical for process quality.
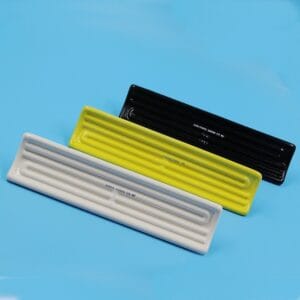
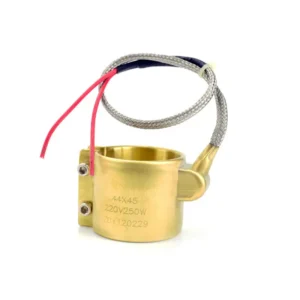
Nozzle Thermocouples (Ring/Shim Style)
The injection nozzle is the final heat zone before the mold. It is a harsh environment with limited space.
Design: A “Ring Lug” or “Shim” sensor bolts directly under a heater band screw.
The Pain Point: The lead wires here are constantly flexed and exposed to drooling plastic.
The Solution: Do not use standard PVC wire. Specify Kapton (high temp) or Fiberglass with Stainless Steel Overbraid (SSB). Adding a flexible “flex armor” spring at the transition point prevents the wire from kinking and breaking.
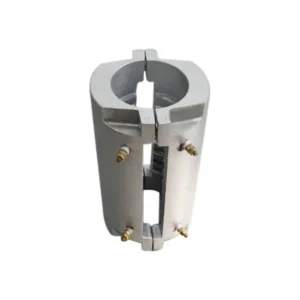
Melt Bolt Thermocouples (Into the Stream)
A “Melt Bolt” replaces a standard bolt in the extruder head, placing the sensor tip directly into the flowing plastic stream.
Tech Spec: These must withstand massive pressure (up to 20,000 PSI).
Materials: Standard SS304 is too soft. Melt bolts are typically machined from 17-4 PH Stainless or Hastelloy to prevent shearing off.
Graduated Depth: Many melt bolts feature a movable tip to measure the “Thermal Gradient” of the melt—checking the temperature at the center of the stream vs. near the wall.
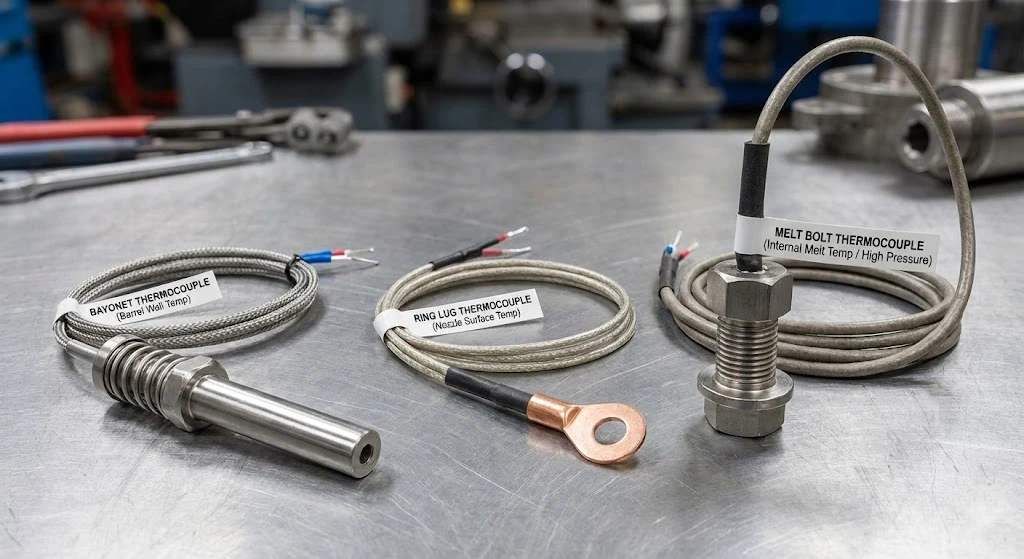
Types of plastic industry temperature sensors bayonet vs nozzle vs melt bolt.
Type J vs. Type K in Plastics
Why is the plastics industry the last stronghold of the Type J thermocouple?
Why Type J Dominates
Historically, major OEMs like Arburg, Engel, and Cincinnati Milacron standardized on Type J (Iron-Constantan).
Sensitivity: In the typical processing range of 200°C to 400°C, Type J has a slightly higher output (mV/°C) than Type K, offering marginally better resolution for older controllers.
Atmosphere: The inside of a heater band or extruder hole is a “reducing” (low oxygen) environment. Type J is more stable here, whereas Type K can suffer from Green Rot if not protected.
When to Switch to Type K?
If you are processing high-performance engineering plastics like PEEK, Ultem, or PSU, melt temperatures can exceed 400°C.
The Risk: At >500°C, the Iron leg of the Type J thermocouple oxidizes (rusts) rapidly, leading to drift.
The Fix: For high-temp resins, upgrade to Type K or Type N. Just remember to change your controller input settings!
Wear Resistance: Glass-Filled Materials
Standard stainless steel probes work fine for Polypropylene (PP) or ABS. But if you run 30% Glass-Filled Nylon (PA66-GF30), you have a problem.
The Issue: Glass fibers are abrasive. As the plastic flows past a Melt Bolt tip, it acts like sandpaper, eroding the sensor wall. Eventually, the tip wears through, leaking 20,000 PSI plastic out of the sensor hole.
The Fix:
Thick Wall: Increase the probe sheath diameter.
Coatings: Specify Tungsten Carbide or Titanium Nitride (TiN) coating on the tip of the Melt Bolt. This hardens the surface to >80 HRC, resisting abrasion.
Ordering Checklist for Plastic Moulders
Before you order spare parts for your maintenance crib, verify these 5 specs to ensure fitment.
✅ 1. Calibration
Type J: (White/Red wire, Black connector). Most Common.
Type K: (Yellow/Red wire, Yellow connector).
✅ 2. Mounting Style
Bayonet: Uses a spring and cap. (Requires an adapter on the machine).
Compression Fitting: Slides along the probe. (Screws directly into the machine).
✅ 3. Dimensions
Probe Diameter: Usually 3/16″ (4.76mm) or 1/8″ (3.17mm).
Bayonet Adapter Length: The distance from the tip to the locking pin. Common sizes: 7/8″, 1-1/2″, 2-1/2″.
✅ 4. Lead Wire Length
Warning: Measure from the Cap/Transition to the end of the wire. Do not include the probe length.
Material: Fiberglass with SS Braid is the standard for durability.
✅ 5. Termination
Spade Lugs: Connects to screw terminals on heater bands.
Standard Plug: Quick disconnect.
Frequently Asked Questions (FAQ)
Why do plastic extruders mostly use Type J thermocouples?
Type J (Iron-Constantan) has been the historical standard for plastics because it is cost-effective and offers high sensitivity in the typical processing range of 200°C–400°C. Additionally, the iron element resists the reducing atmospheres often found inside the tight bores of extruder heating zones. However, for high-temp plastics like PEEK, Type K is widely used.
How do I adjust a bayonet thermocouple?
Slide the bayonet cap along the spring. To set the correct tension, push the probe into the hole until it hits the bottom. Then, adjust the cap so that the spring must be compressed by about 12-15mm to lock onto the adapter pins. This “pre-load” forces the tip firmly against the hole bottom for accurate reading.
What is a “melt bolt” thermocouple?
A melt bolt is a specialized high-pressure sensor designed to screw directly into the extruder barrel (usually at the head or die). Unlike standard sensors that measure the steel wall, a melt bolt immerses its tip into the flowing plastic stream to measure the actual melt temperature.
Can I use a grounded thermocouple in an injection molding machine?
Yes, grounded junctions are preferred in plastics because they respond faster to the rapid heating/cooling cycles of the molding process. However, be careful of electrical noise from heater bands. If readings jump erratically, verify the shielding or switch to an ungrounded junction if the controller is sensitive to ground loops.